
Easy Homemade Kombucha for Beginners (From Scratch Guide)
A fantastic way to enjoy spring and summer flavors in a homemade, fizzy, gut-friendly drink at home.
As a full-time student in my senior year of college, I’m constantly looking for small and intentional ways to combat stress and the business of this season of life that I am in. Between my classes, studying, working, and maintaining a household with my husband, I’ve found that making things from scratch brings me a sense of calm and soulful restoration to some of my busiest weeks.
After taking some time this past winter to refocus some of my goals for the New Year, I decided to try something new and that was making my own homemade kombucha from scratch.
It turns out that kombucha and the fermentation process have a lot to teach an individual about patience and intentional living.
Recently, one RnR reader shared that their favorite seasons for living intentionally are spring and summer. With fresh fruits and seasonal ingredients becoming more available during these months, drinks like homemade kombucha have become an especially fun way to experiment with simple fermentation and natural flavors.
What Is Kombucha?
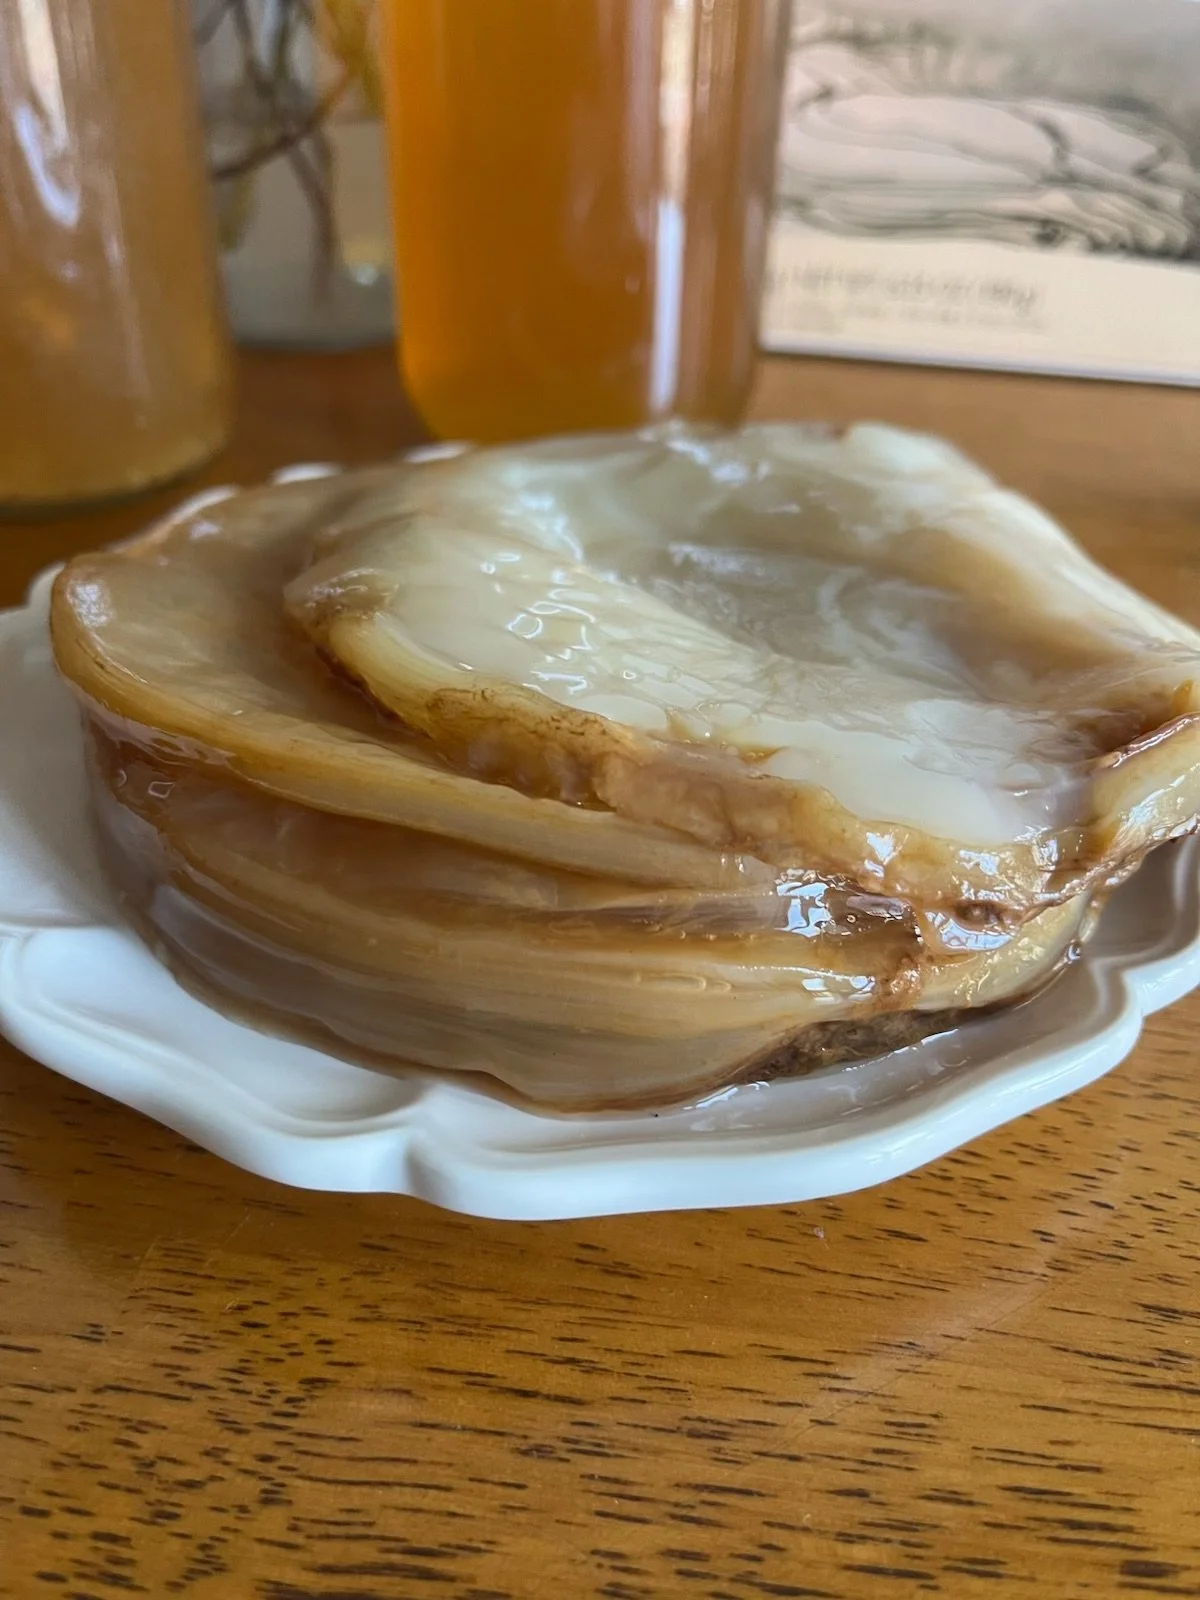
Kombucha is the process of fermenting tea. The fermentation is made from brewing sweetened organic black or green tea. The fermentation process also requires a symbiotic culture of bacteria and yeast called a SCOBY, and over the course of about 7-10 days, the SCOBY consumes most of the sugar content within the tea mixture and transforms the tea into a tangy and fizzy drink that is great for gut health.
While kombucha has been trending in the past several years, the process of fermentation itself is nothing new. Cultures around the world have preserved foods and drinks this way for generations.
At its core, kombucha is simply tea, sugar, water, and time.
Ingredients You’ll Need to Make Kombucha at Home
To make an easy homemade kombucha recipe, you only need a few basic ingredients:
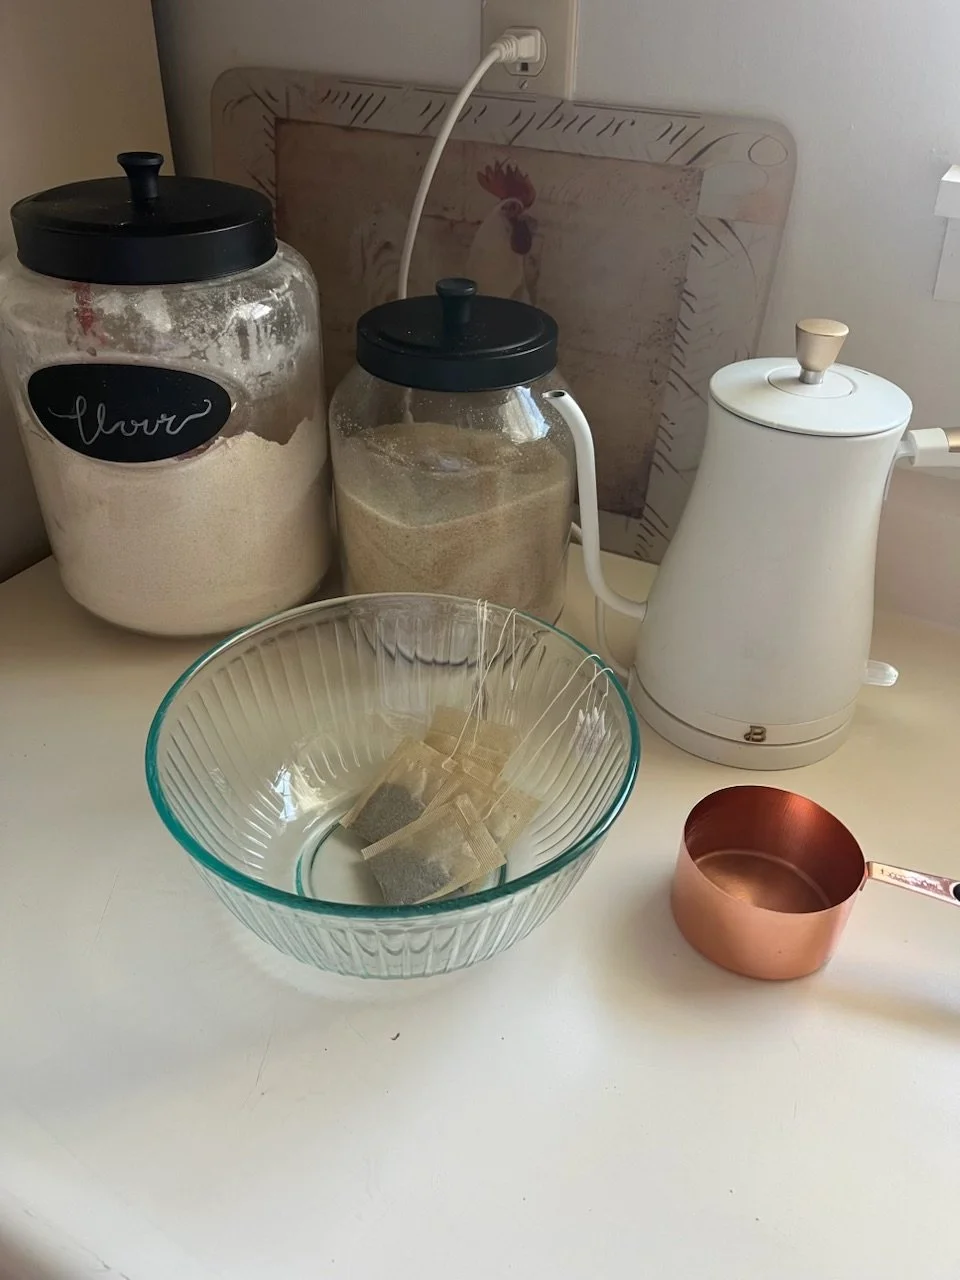
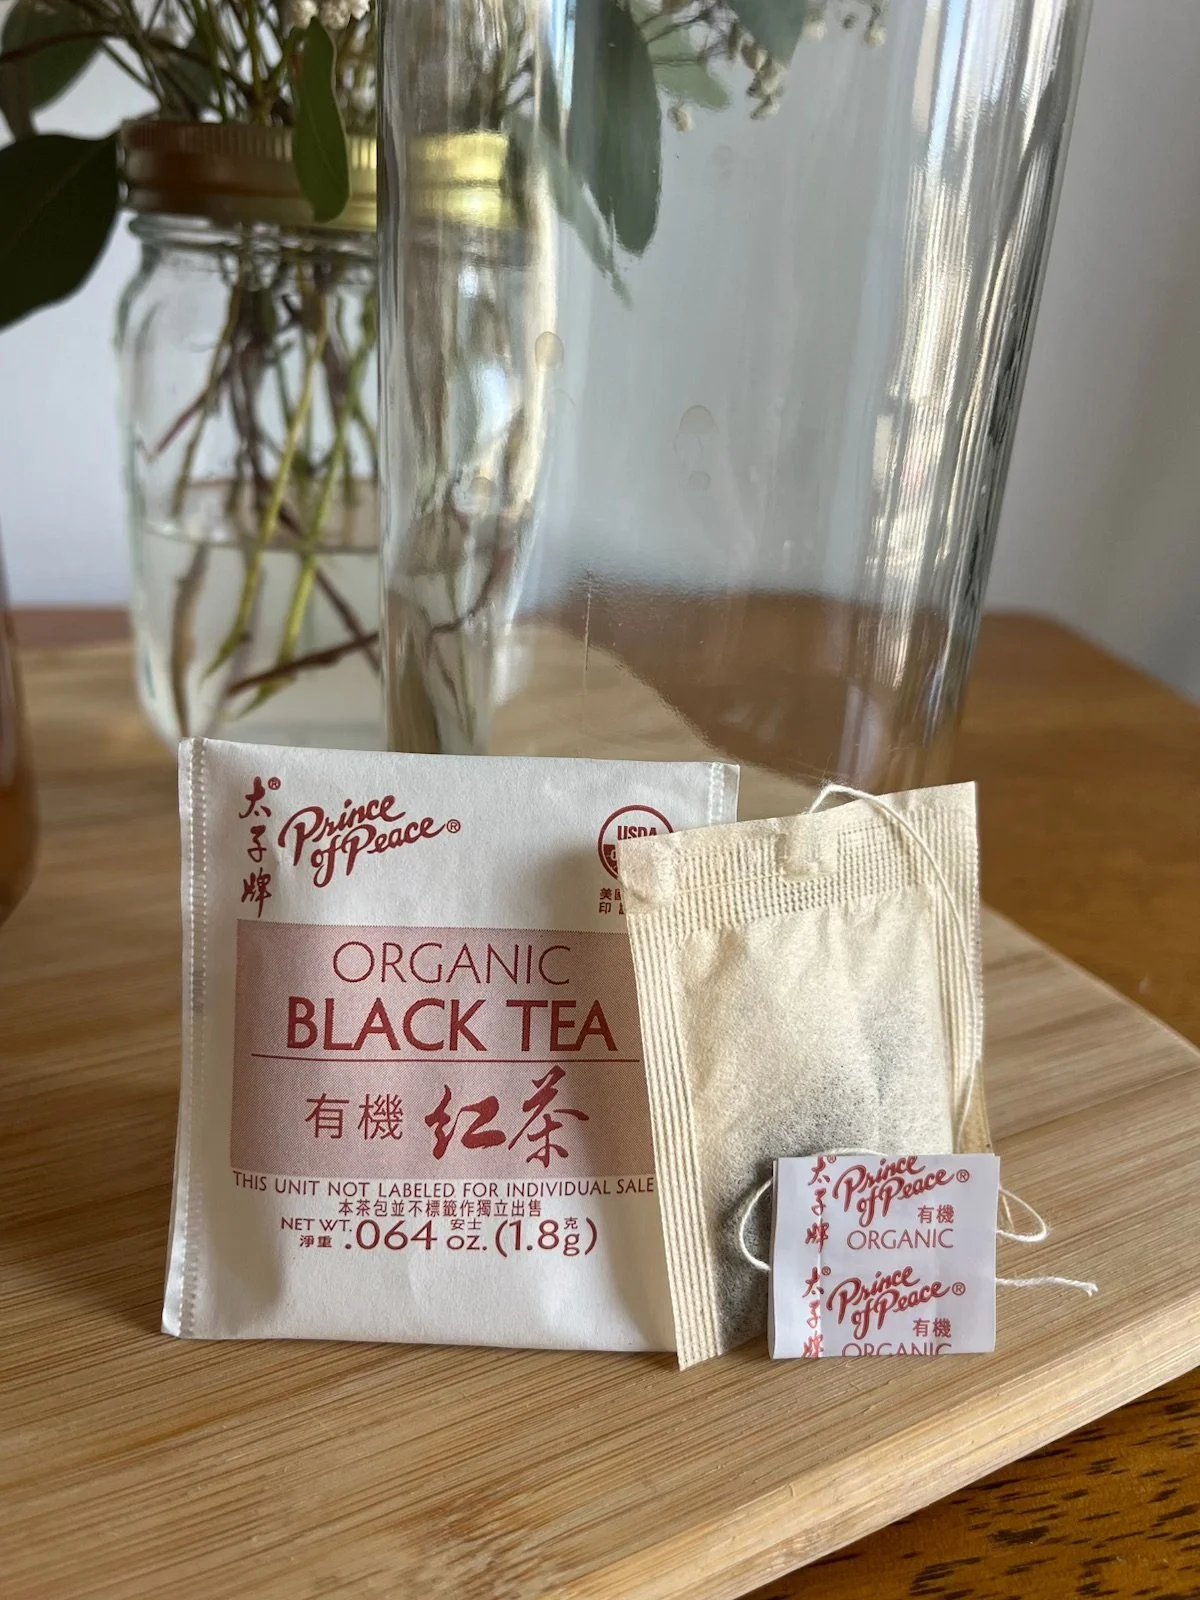
4–5 organic black or green tea bags (It is very important that you buy organic black and green tea. If the tea is not organic, sometimes preservatives on non-organic tea can disturb the fermentation process and cause your scoby to mold. This will result in contaminating your whole kombucha batch, and you will have to discard your tea and scoby and start all over. My favorite type of tea to use is an organic black tea from the brand Prince of Peace USDA Organic Black Tea)
1 cup organic cane sugar
8 cups of water (The best water used for creating kombucha is filtered water but tap water with low levels of chlorine are also okay to use. Just be mindful of the chlorine content that may be in your tap water as this can also kill your scoby resulting in molding.)
1 scoby (You can find these at any health food stores or sometimes in organic unflavored bottled kombucha at the grocery store. Here is my favorite brand that sells scobies: Cultures for Health)
1–2 cups starter tea (This tea can come from previously brewed kombucha or may sometimes be included in the scoby package when you buy a scoby at the health food store. This ingredient is VERY important to remember as this tea helps protect the scoby and streamline the fermentation process further. If you would like to learn more about this process, click here.)
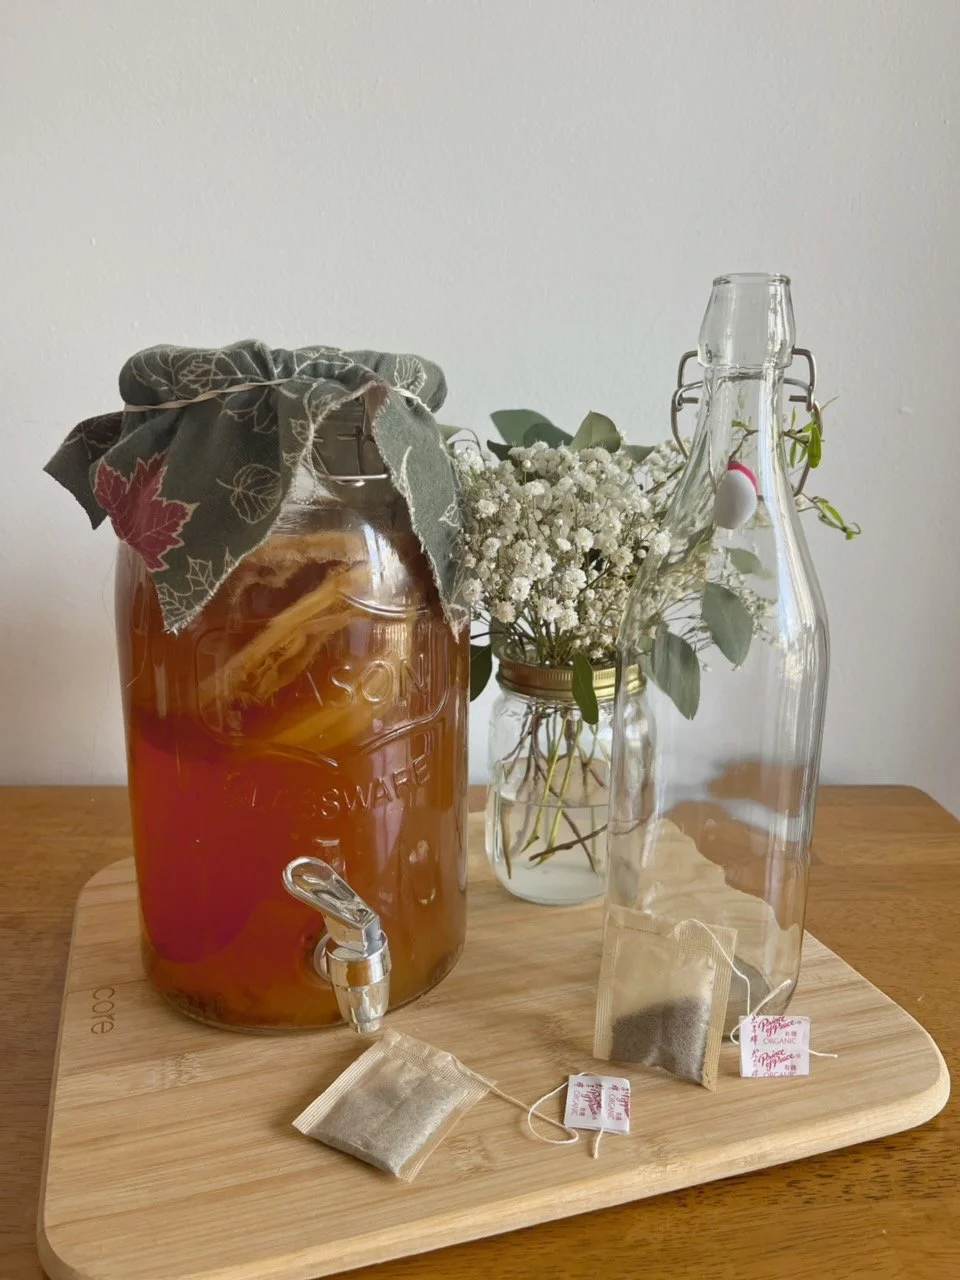
A large glass jar (The type of glass jar does not matter a whole lot, but I have found that one will for sure need at least 1 gallon, and I prefer to have a glass beverage dispenser jar. Here is the specific one that I use: Mainstays Clear Glass Mason Sun Tea Beverage Dispenser Jar. This makes the after drinking process so much easier to do once fermentation is complete.)
A breathable cloth and rubber band (I just used an old 100% cotton pillowcase and cut it into a square big enough to cover the top of the kombucha jar. Although this is an easy and low-cost option, there are many cute jar/bowl cover options on amazon or Etsy that are more aesthetic and have a built-in elastic band that you can just slide on top of your jar.)
That’s it! No complicated equipment required!
Step-by-Step Kombucha Fermentation Process
Step 1: Brew the Sweet Tea
Bring your water to a boil. Remove from heat and steep the tea for 10–15 minutes. Stir in the sugar while the tea is still warm until fully dissolved.
Let the tea cool completely to room temperature. This is important because hot tea can damage the scoby.
Step 2: Add the SCOBY and Starter
Pour the cooled tea into your glass jar. Add the starter tea, and then gently place the scoby on top.
Step 3: Cover and Ferment
Cover the jar with a breathable cloth secured by a rubber band. Place it somewhere out of direct sunlight at room temperature.
Allow the kombucha to ferment for 7–10 days. Keep in mind that the time it takes for kombucha to ferment depends on the season. Cooler temperatures can slow down the process, while warmer environments help it move more quickly. Fermentation relies on warmth and even creates a bit of its own heat (Woah! The science behind kombucha is pretty cool!)
The longer it ferments, the less sweet and tangier it becomes.
Step 4: Taste and Bottle
After about a week, begin tasting your kombucha. When it reaches your desired flavor, remove the scoby or dispense the kombucha through the bottom of your drink dispenser jar (reserving 1–2 cups of starter tea liquid for your next batch).
Pour the finished kombucha into bottles, and now you can drink it as-is.
Optional Steps for Flavored Kombucha (For More Natural Fizz + Flavor)
If you’d like your kombucha to be more carbonated or flavored, a second fermentation is the next step. This is where the magic — and the bubbles — really begin.
What You’ll Need:
Finished kombucha (After first fermentation)
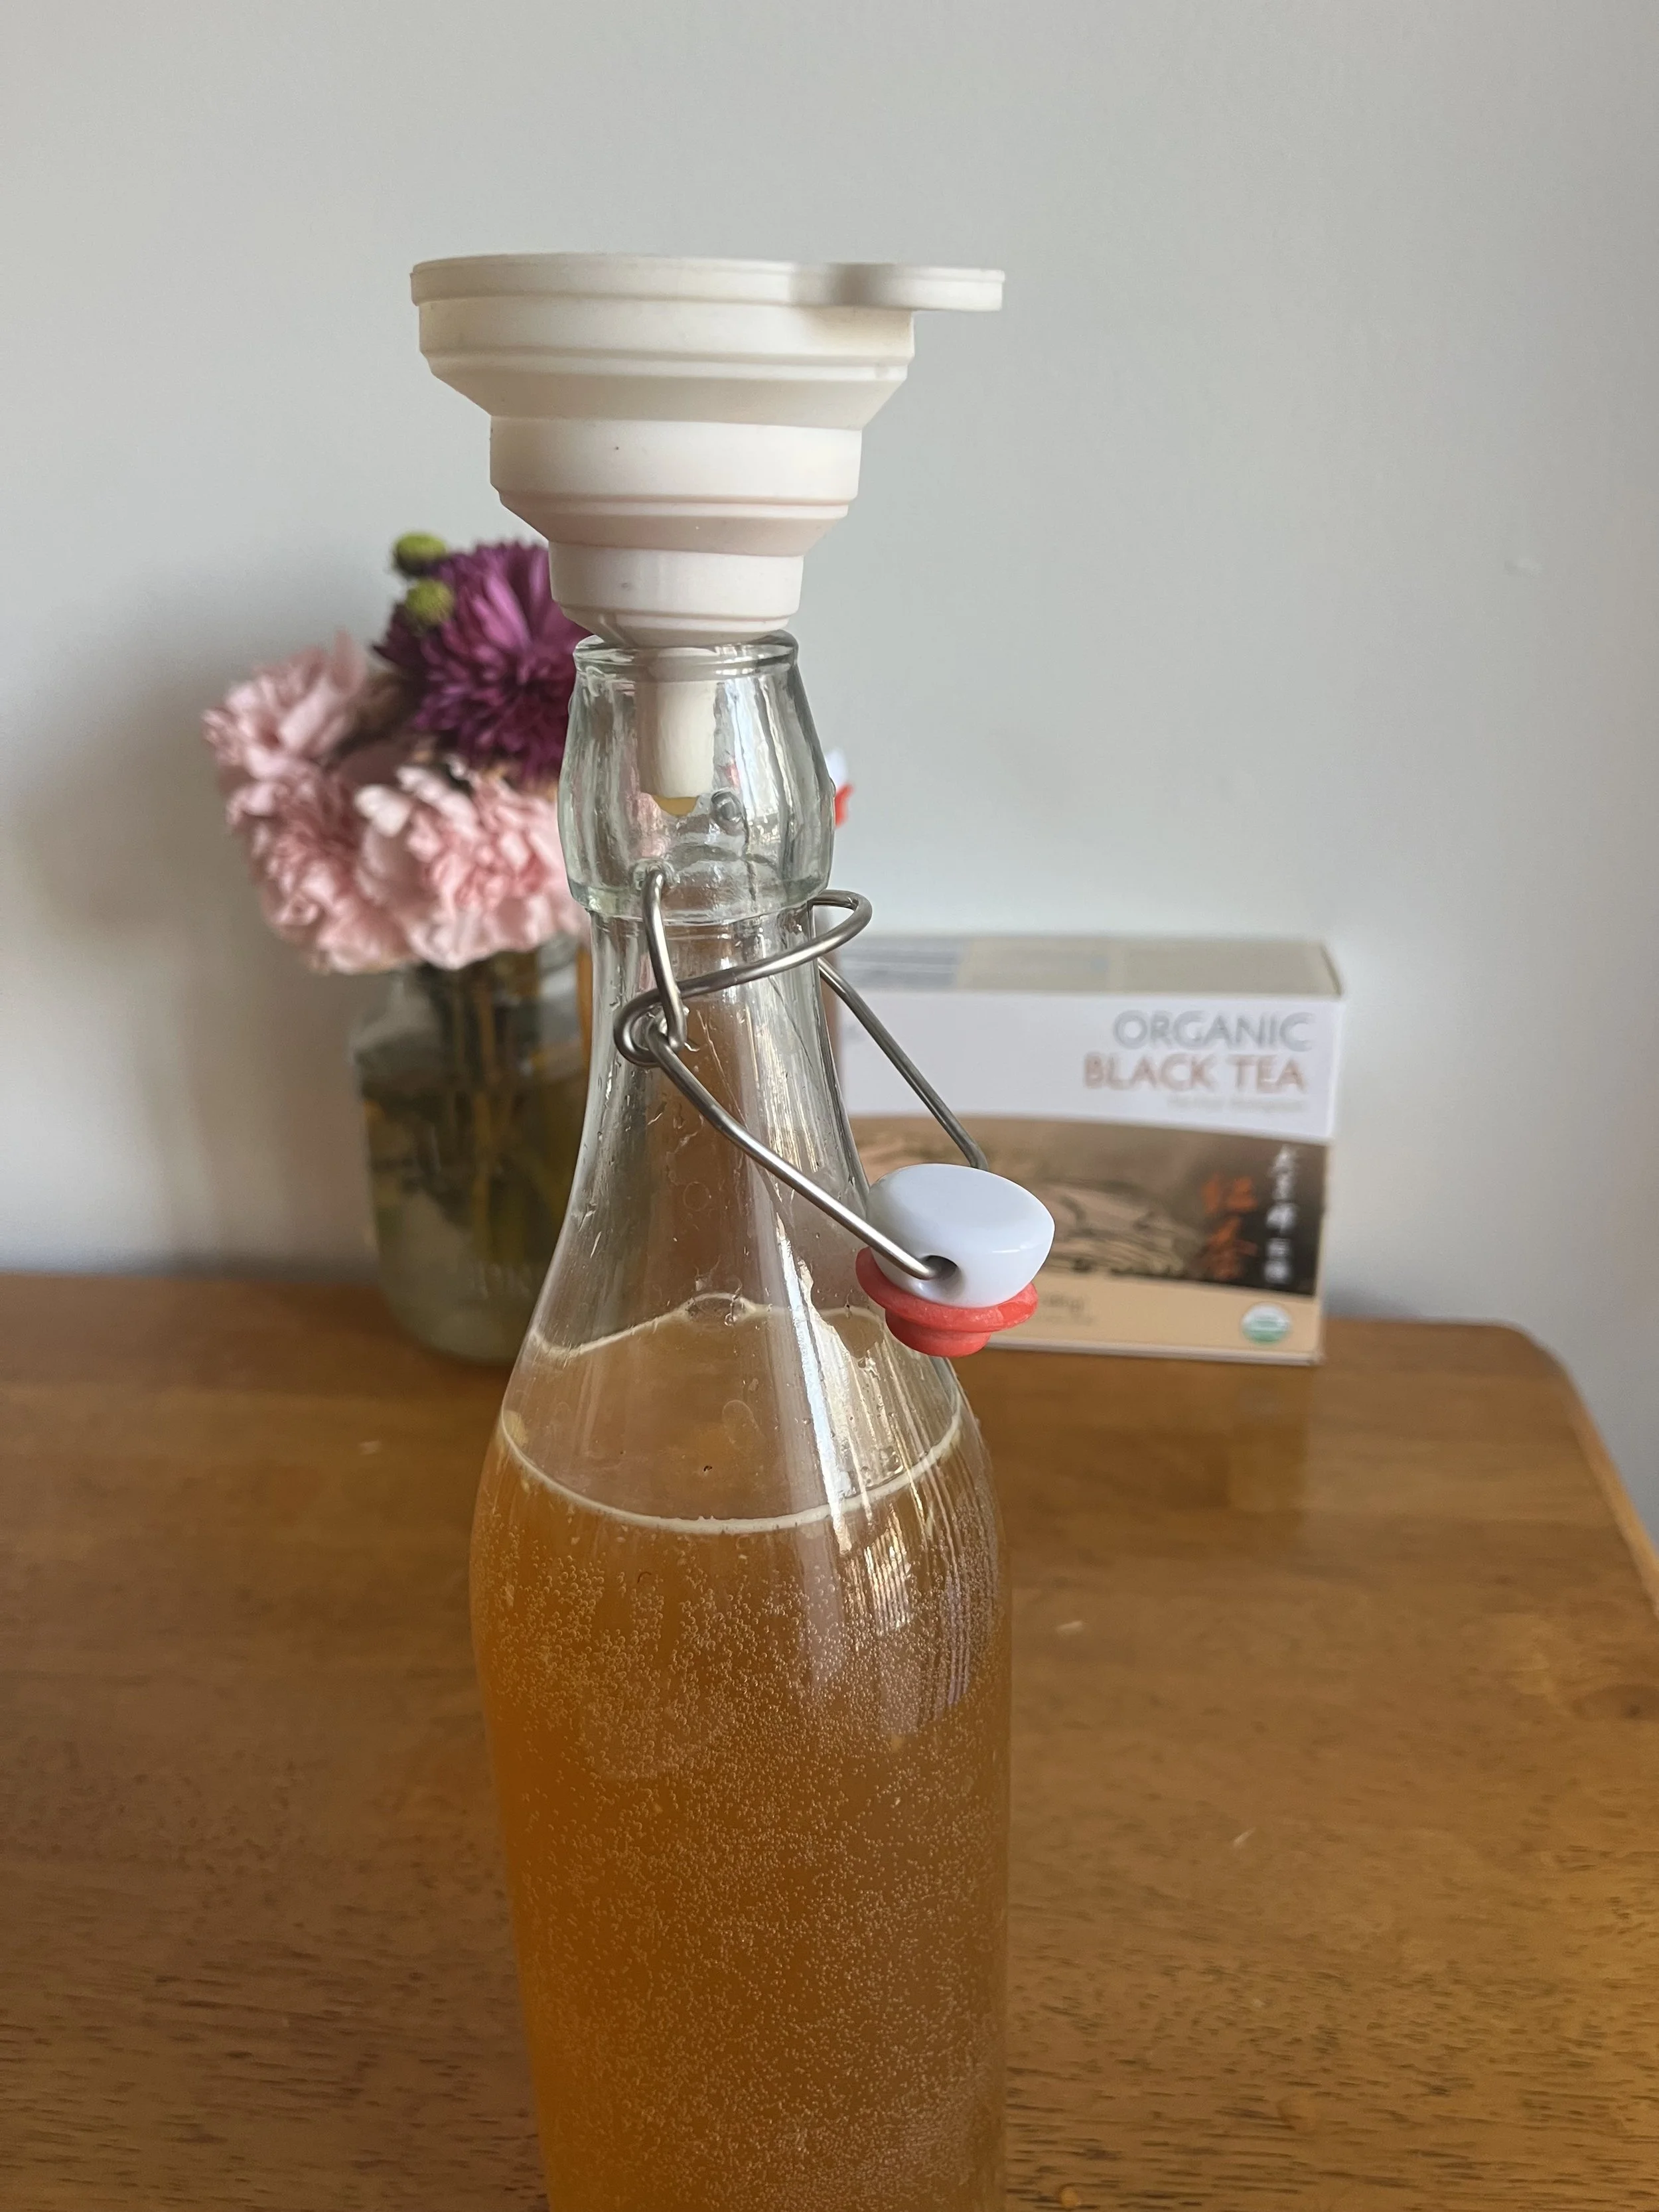
Airtight glass bottles (Swing-top bottles work best for this stage. Here are the ones I use: Swing Top Glass Bottles,8 Pack [1 Liter / 33 fl. oz.] Airtight Stopper Lids – Flip Top Brewing Bottle for Fermentation.)
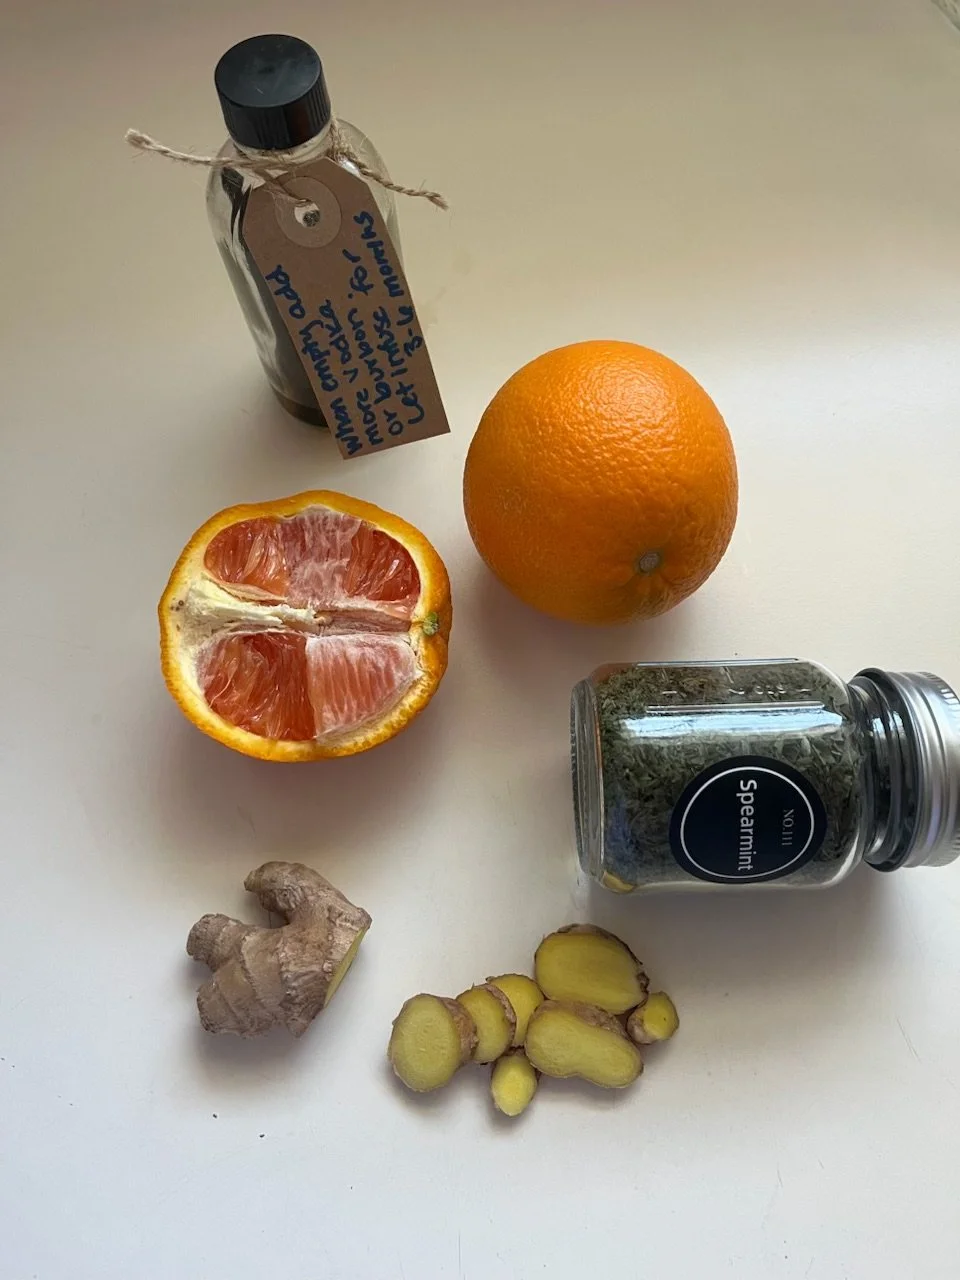
100% fruit juice or fresh/chopped fruit
A small funnel (The swing-top bottles I bought from Amazon came with two foldable silicone funnels that I use to make my kombucha.)
Fine mesh strainer or cheese cloth (If you prefer smoother kombucha without fruit pulp if you use fresh fruit puree or chopped fruit.)
Step 1: Bottle the Kombucha
Pour your finished kombucha into airtight glass bottles, leaving about 3-4 inches of space at the top.
Step 2: Add Flavoring
Add your flavoring directly to each bottle.
If you are using 100% fruit juice, add about 1–2 tablespoons per 16-ounce in your bottle.
If you are using fresh fruit, add 1–3 tablespoons of chopped fruit or berries.
Here are a few of my favorite fruit juice options:
100% apple juice
100% grape juice
100% pomegranate juice
Juice-only second fermentation is beginner-friendly and typically produces consistent carbonation.
If you would like to use fruit puree or chopped fruit here are a few of my favorite combinations:
Flavor Combination Ideas
If you’d like to experiment, here are a few combinations:
Strawberry + lemon
Blueberry or mixed berry + ginger
Raspberry + lime
Peach + vanilla bean
Apple + cinnamon
Pineapple + mint
The natural sugars feed the remaining yeast, which creates even more carbonation during this stage. After adding you fruit juice or pureed or chopped fruit, make sure to leave 1-2 inches of “headspace” in your bottles. This small amount of headspace allows carbonation to build safely in the jar.
Here are a few other great kombucha recipes try: Pear Chai Kombucha, Orange Ginger Kombucha, Rosemary Grapefruit Kombucha, Second Fermentation Kombucha Recipes.
Step 3: Seal Tightly
Secure the lids tightly. An airtight seal is essential, as it traps carbon dioxide inside the bottle; this is what creates the natural fizz.
Step 4: Let It Ferment at Room Temperature
Allow the bottles to sit at room temperature for 2–5 days. Warmer environments will speed up the process, while cooler spaces may take a little longer.
Begin checking around day 2. The longer the bottles sit, the more carbonation will develop.
*A Note on Safety*
During the second fermentation, you should gently “burp” the bottles once a day (carefully opening the bottles and resealing them) to release excess pressure. If you do not “burp” the bottles, there is a possibility that you may be creating a sugary explosive that can shatter your bottles.
Step 5: Refrigerate
Once your kombucha reaches your desired level of fizziness, transfer the bottles to the refrigerator. Cold temperatures significantly slow fermentation and help stabilize the carbonation.
If you used fruit puree or chopped fruit, for a smoother finish, you can strain out the fruit before serving if desired.
What If Mold Forms?
Mold appears fuzzy and dry (often green, blue, or black). If you see mold, discard the batch entirely and start fresh with a new scoby. A healthy scoby may look unusual but should never appear fuzzy.
Does Kombucha Contain Alcohol?
Kombucha naturally contains a small amount of alcohol because it is fermented beverage. As yeast consumes sugar, it produces carbon dioxide (which creates fizz) and trace amounts of alcohol.
Most homemade and store-bought kombucha contains less than 0.5% alcohol by volume, which is considered non-alcoholic. However, longer fermentation times or added fruit and juice during second fermentation can slightly increase the alcohol content.
Proper fermentation and refrigeration help keep levels low.
Common Questions about Kombucha
How Long Should Kombucha Ferment?
For beginners, 7–10 days are typical. Warmer kitchens may ferment faster, while cooler spaces may take longer. Taste-testing is the best guide to determine if the fermentation process has produced the desired results, you are looking for.
Why Is My Kombucha Not Fizzy?
If your kombucha isn’t fizzy, it may need:
A longer fermentation
A proper seal during second fermentation
Or a warmer environment
Natural carbonation develops during the second fermentation phase, especially when fruit or a small amount of additional sugar is added.

What Making Kombucha Is Teaching Me About Slow Living
While making kombucha the past few months, I have noticed that this traditional practice of fermenting foods is definitely a task that takes patience and cannot be done while multitasking. You cannot rush it, and you cannot force it. You have to learn as you go while creating kombucha.
As someone who is balancing a full-time college career, the beginnings of a small business, and working, this process has been a gentle reminder that not everything happens overnight, and it is okay to do a task slowly. By doing so, it allows me to let go of the business and enjoy something that is unrelated to my other work-related or school-related tasks.
Fermentation is a slow and rewarding process when one is consistent in understanding the practice itself and then enjoying the fruits of its labor.
In many ways, I have thought that learning how to brew kombucha at home almost feels like a small act of resistance against the fast-paced culture around me. It’s simple. It’s traditional. And it invites patience back into my daily life.
And maybe that’s what intentional living is really about, not doing more, but doing a few small things every day or every week that brings us joy.
If you try making this easy homemade kombucha recipe, I’d love to hear how it turns out. And if you’re also learning to make more things from scratch as the spring and summer seasons begin, you’re in good company here.